Coming up soooooon! Spectraflame Deep Blue passion/merc with two layers & colors of candy flames! Detailed base..head AND tail lights painted on..white wall RR’s!


Coming up soooooon! Spectraflame Deep Blue passion/merc with two layers & colors of candy flames! Detailed base..head AND tail lights painted on..white wall RR’s!
Here’s a peek at the stretched merc coming up. This is post clear stage as all moving panels had to be removed or risk bridging gaps…which is not a good thing! So now…the task of sanding/polishing begins. Followed by assembly. Im looking at several days before its done…but…with any luck and no sand thru incidents…she will be ready sometime, late, this coming weekend. Stay tuned!!

Here are some better pics of the multilayer flame Candy-fied Custom Convoy! Major details…all lights..black washed grill, engine, steps, bumpers, mud flsps, fuel tanks. Drilled exhaust stacks and realistic “scraped” 5th wheel trailer hitch. Redline Real Riders all around…one of one!


This beauty has several subtle fades with multiple colors and layers of candy and pearl colors. Tribal flames on top, nose, and sides. Multilayer candy pagan gold traditional flames on lower sides. One of one with detailed lights and logo. RRs up front with sanded tread rears. All with white letter Goodyears!


Ok…here is a final peek/first look…fully assembled Blue Blazes Silverado 4×4!
More to come!

Quick peek at a multilayer flames custom convoy…one of one…detailed out!! She is a sweet one! Coming SOON!
Here is a side by side comparison of a stock silverado 4×4 chassis and the one I’ve just finished for the Blue Blazes edition one of one. Smoothed and polished bumpers, grill, side steps, front and rear axles/differentials, plus hand painted blackout chassis and drilled exhaust tips. Of course the most notable mod is the custom made rear drive shaft! Old solid block style “shaft” was drilled/cut/removed and ground very smooth so as to not catch the eye. Then two holes were drilled in chassis where the drive line should attach. Stainless steel tubing was cut to length and ends beveled/polished. It was then mounted using brass rod in each end. The tension holds the shaft extremely stable but still was given a drop of epoxy for lasting results.


Think its done except some details…will see while I get some others ready. 4×4 chassis.
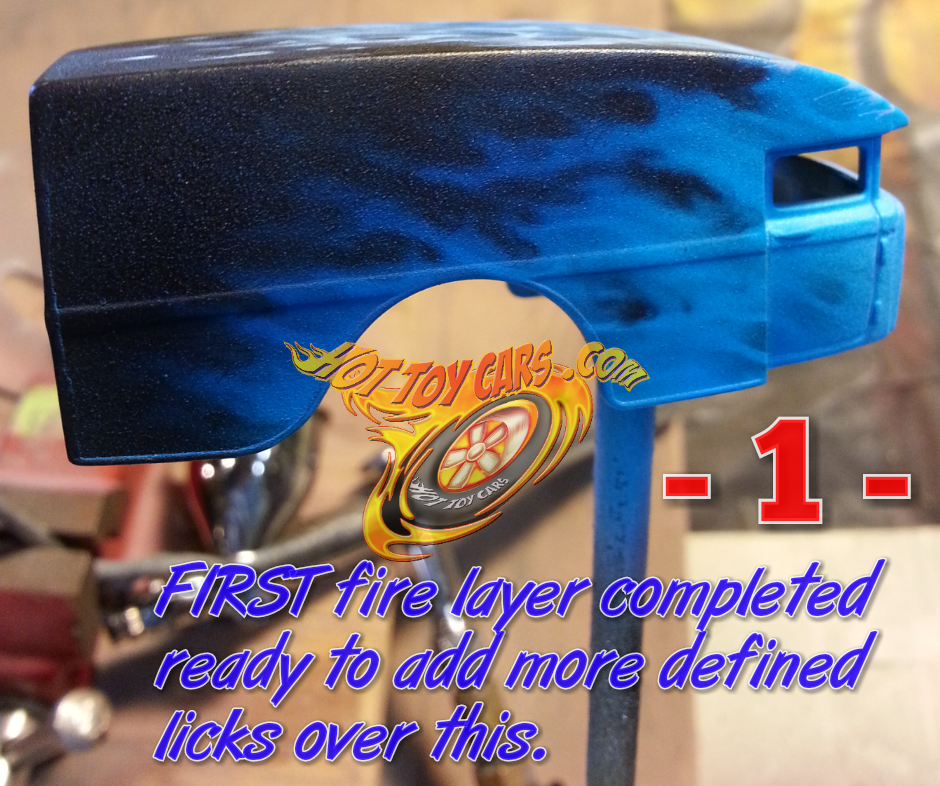 This layer is the first one and is eventually going to be more of a glow or background when subsequent layers are applied. So it is done loosely, mostly freehand with the nozzle of the airbrush tilted at a 45 degree angle, blowing towards the rear of the casting.
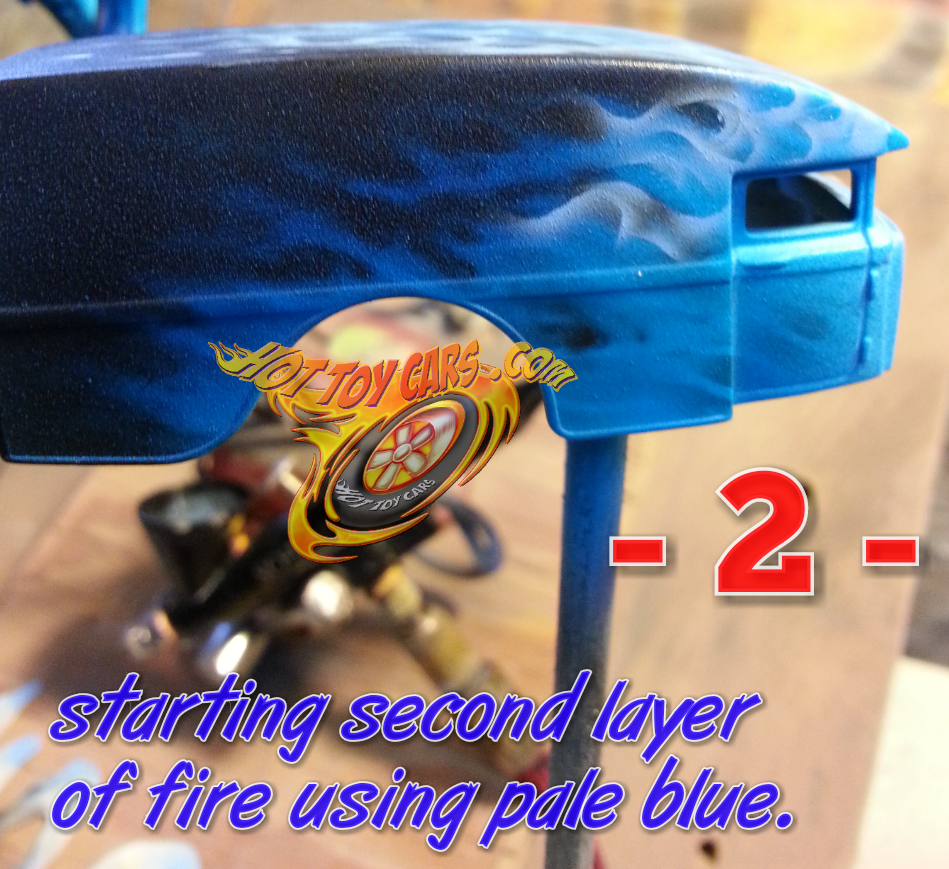 Now I begin adding tighter defined licks with a mixture of AutoAir Wicked detail White, Transparent Base and High Performance reducer. Its almost a milky looking liquid. 2 drops of Detail Blue wicked is added to the mix when in airbrush. I am using a Badger Sotar for this step and HotDawg stencil from FlameMasks.com to create the fire licks.
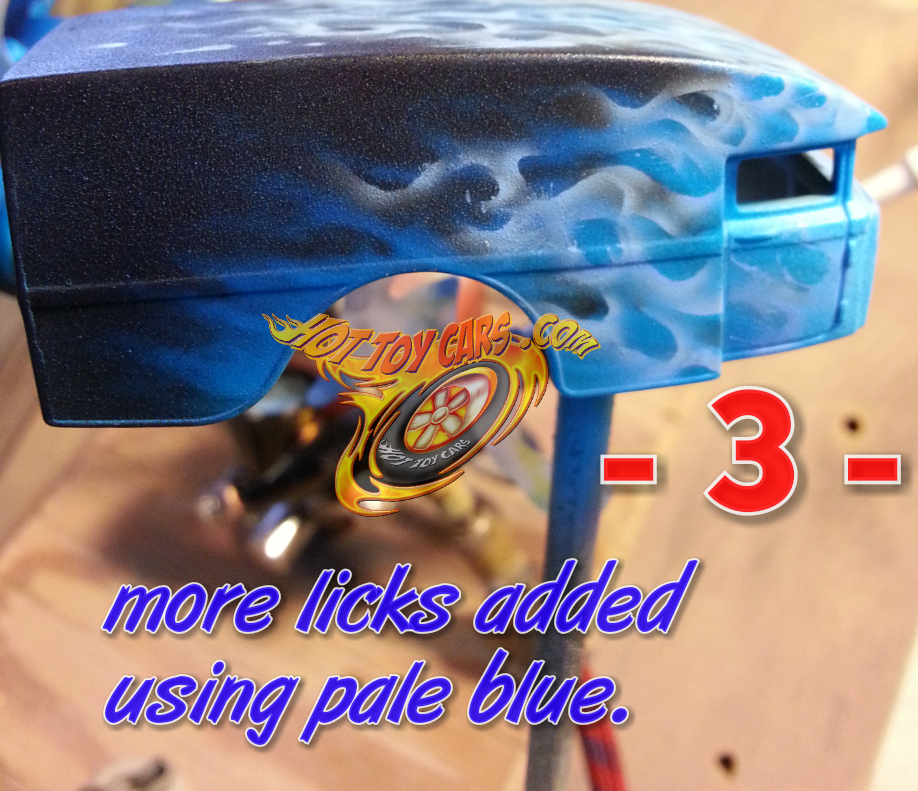 Adding more fire licks. Notice these licks generally are inside the confines of the first layer but do not follow it completely. The first layer also acts as a “road map” of where the fire will go on in subsequent layers..
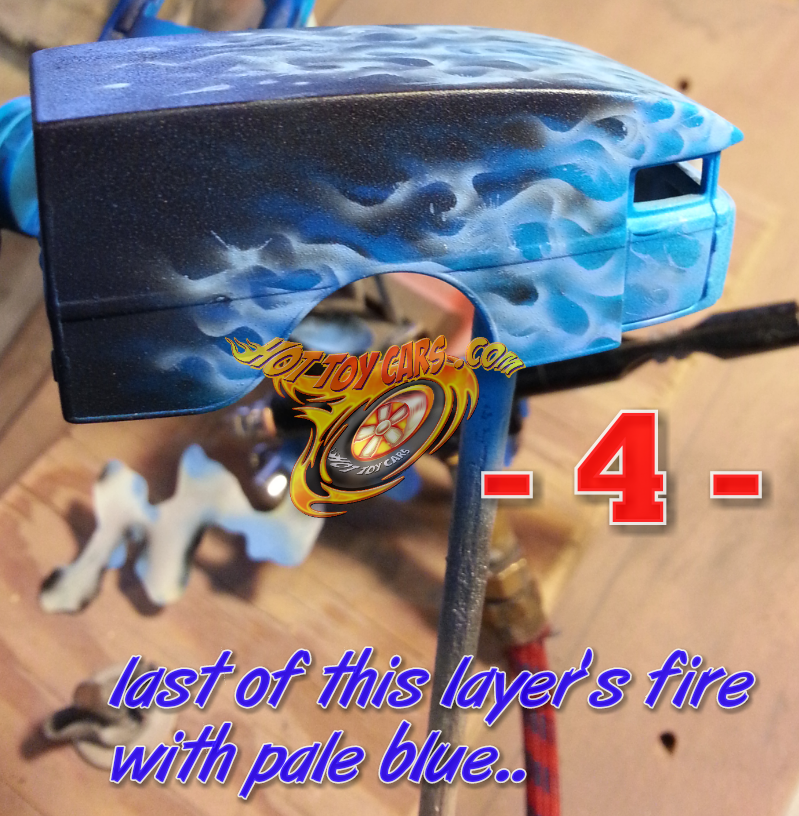 And the last of this layers fire licks are done. Notice these licks while more defined than the previous layer, are still a bit wide and loose. This is how each layer should progress. Each layer becoming tighter and more defined than the last while still not following the same paths exactly.
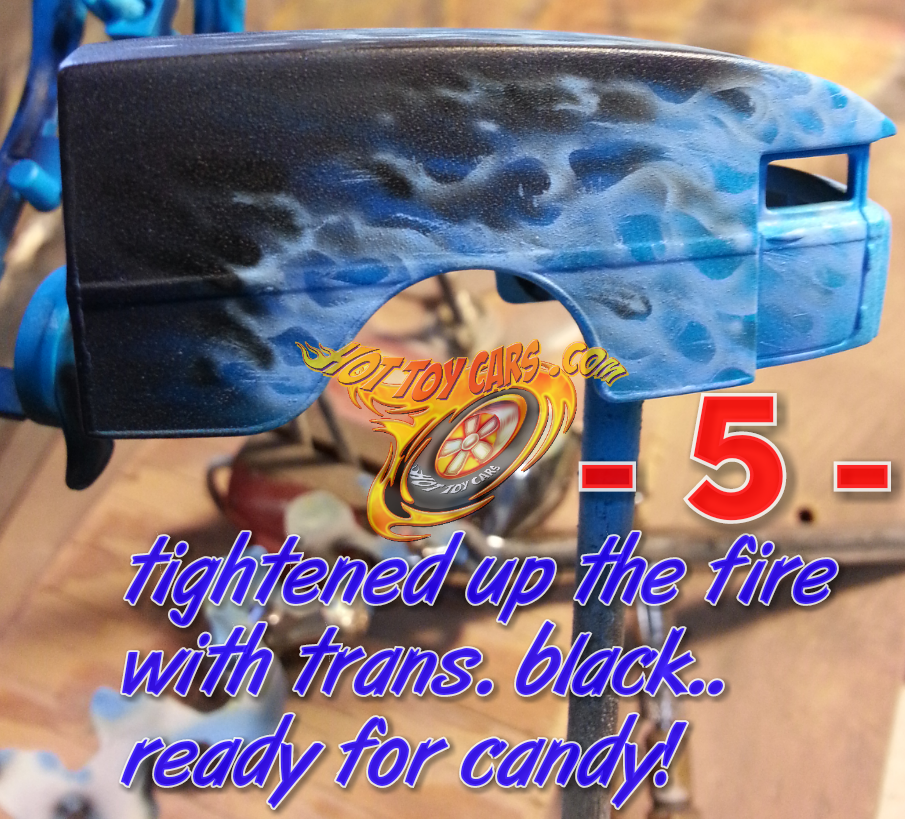 I used a trans parent black to define and “erase” unwanted licks or areas of the 2nd layer fire licks. This should be done with care.
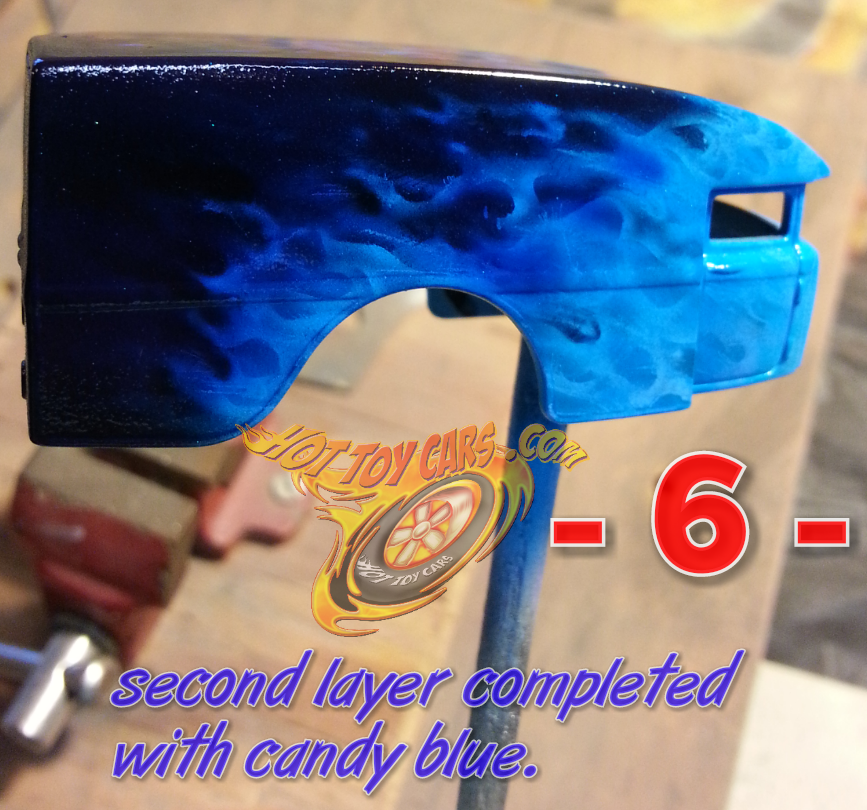 This is the final step for the second layer of fire. Candy blue is applied in several light layers fading from dark to very light towards the front. More layers of candy are applied at the rear than the front, creating a fade in the color.
GET READY…THE LAST BadBat TWO CAR SET is coming up For SALE THIS WEEKEND!!!!!!!!!
Its gonna have a SPECIAL PRICE too. Likely will go fast!!
This last VW DragBus had some very minor paint defects that I cannot get out, so it either strip it down and start over (which not likely to happen)
~ OR ~
Sell it at a discount..which is what Im going to do.
The imperfections do not detract from the overall look of the bus. Everything looks like the rest except a few ultra tiny specks on the sides, near flames. If I didnt tell you about them..you likely would never even notice, because they are that minor. However, I strive for perfect finishes, like the top and rest of the bus turned out. But again I hate to strip it for these minor issues…so keep watching for start time. I will send it to our newsletter subscribers first, then post on the Hot Toy Cars blog and social media pages within an hour of start time.
I dont know if it will go as soon as it listed or remain available for several days?..but the other two sets sold quickly..and THIS is the LAST ONE…so you never can tell.