
How about a rare peek at my Blue Blazes FIRE technique??
Ok…you got it! lol
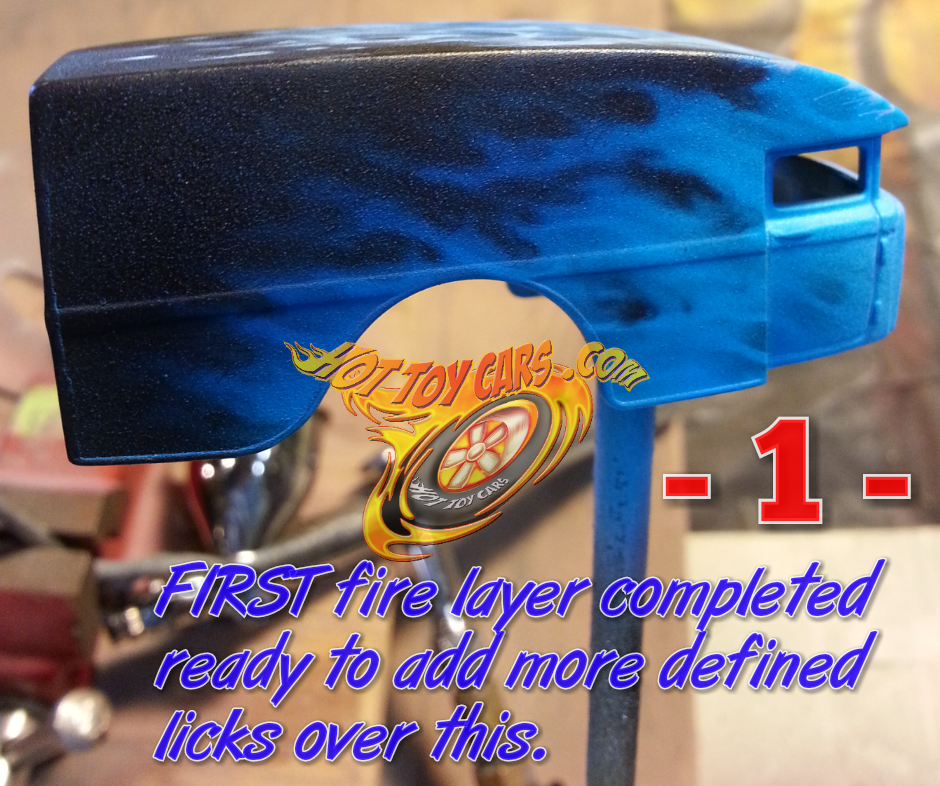
STEP 1 ~ loose fire added and coated with candy blue.
 This layer is the first one and is eventually going to be more of a glow or background when subsequent layers are applied. So it is done loosely, mostly freehand with the nozzle of the airbrush tilted at a 45 degree angle, blowing towards the rear of the casting.
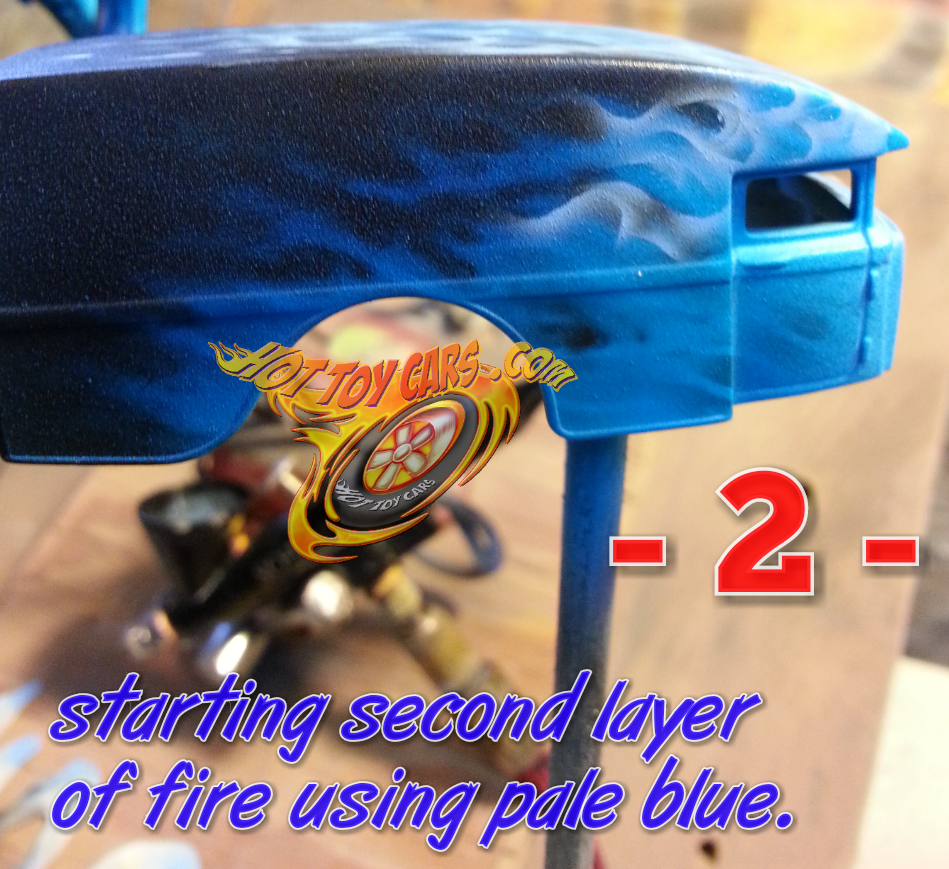
STEP 2 ~ Starting to add tighter, more defined fire licks.
 Now I begin adding tighter defined licks with a mixture of AutoAir Wicked detail White, Transparent Base and High Performance reducer. Its almost a milky looking liquid. 2 drops of Detail Blue wicked is added to the mix when in airbrush. I am using a Badger Sotar for this step and HotDawg stencil from FlameMasks.com to create the fire licks.
 Now I begin adding tighter defined licks with a mixture of AutoAir Wicked detail White, Transparent Base and High Performance reducer. Its almost a milky looking liquid. 2 drops of Detail Blue wicked is added to the mix when in airbrush. I am using a Badger Sotar for this step and HotDawg stencil from FlameMasks.com to create the fire licks.
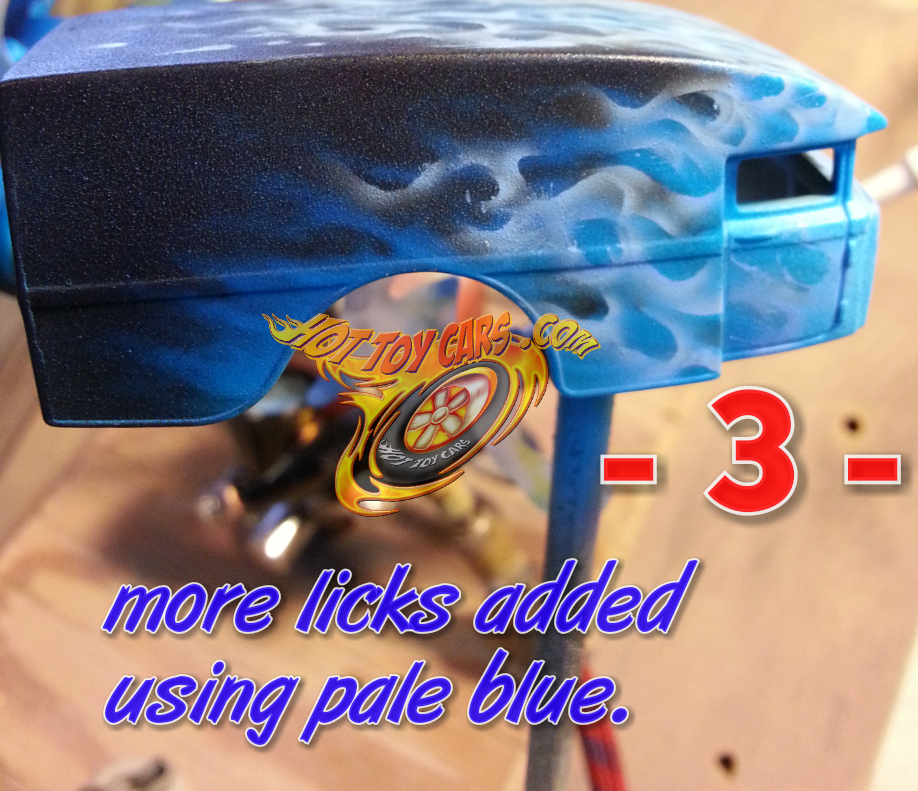
STEP 3 ~ More licks added.
 Adding more fire licks. Notice these licks generally are inside the confines of the first layer but do not follow it completely. The first layer also acts as a “road map” of where the fire will go on in subsequent layers..
 Adding more fire licks. Notice these licks generally are inside the confines of the first layer but do not follow it completely. The first layer also acts as a “road map” of where the fire will go on in subsequent layers..
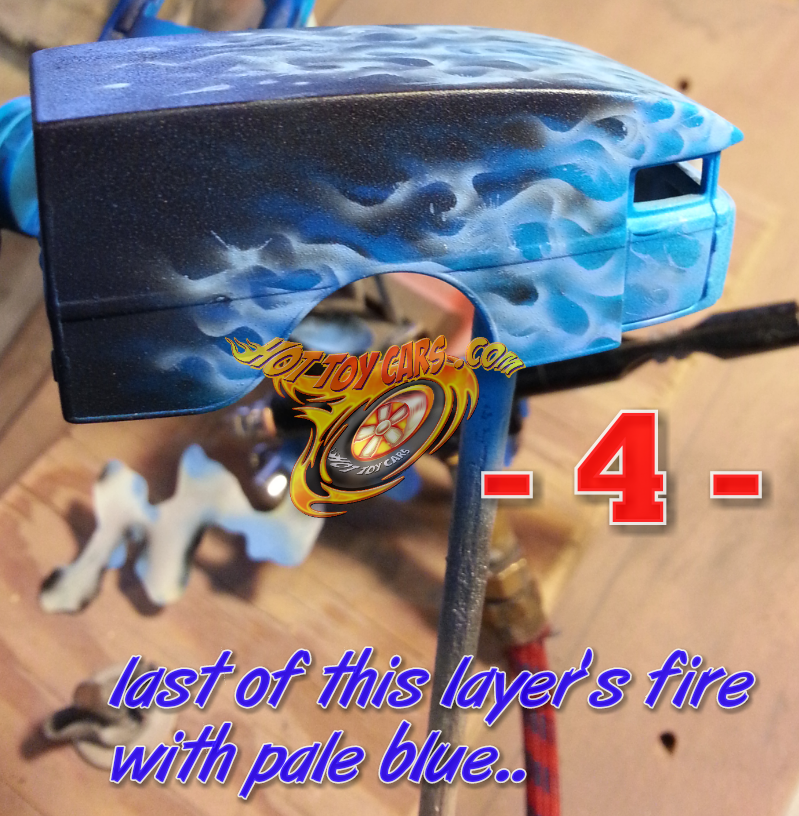
STEP 4 ~ Fire licks of layer 2 are completed.
 And the last of this layers fire licks are done. Notice these licks while more defined than the previous layer, are still a bit wide and loose. This is how each layer should progress. Each layer becoming tighter and more defined than the last while still not following the same paths exactly.
 And the last of this layers fire licks are done. Notice these licks while more defined than the previous layer, are still a bit wide and loose. This is how each layer should progress. Each layer becoming tighter and more defined than the last while still not following the same paths exactly.
STEP 5 ~ Erasing and defining the licks.
 I used a trans parent black to define and “erase” unwanted licks or areas of the 2nd layer fire licks. This should be done with care.
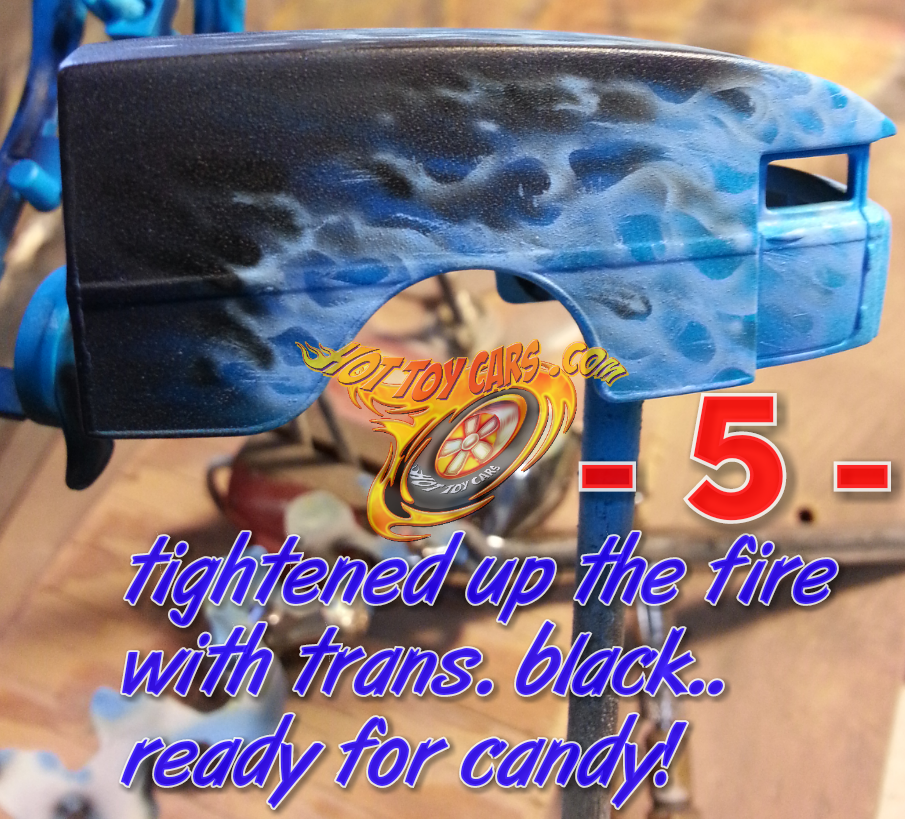 I used a trans parent black to define and “erase” unwanted licks or areas of the 2nd layer fire licks. This should be done with care.
STEP 6 ~ 2nd Layer completed with a few coats of candy blue.
 This is the final step for the second layer of fire. Candy blue is applied in several light layers fading from dark to very light towards the front. More layers of candy are applied at the rear than the front, creating a fade in the color.
More layers will be added (usually about 5 to 6 total} after this. Each getting more and more defined than the previous layers. The final two layers should be adding a lot less new licks, but rather add to existing licks. Thise should be small areas where the fire would be the most “hot” if it were really burning. In the last couple layers, remember the old saying “Less..is MORE.”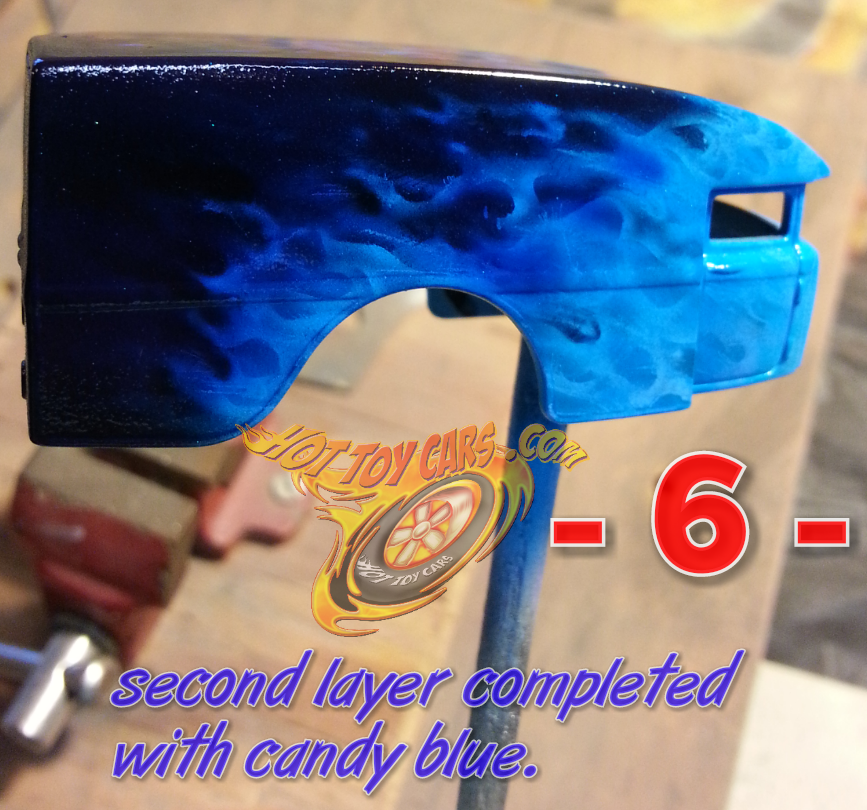