Tag Archives: in process

KB Kustoms Diecast Retirement – Thank You Fans!!

Its with a great deal of sadness and some trepidation, that I announce my official retirement from custom diecast paint works.

First, before I go any further, I would like to say thanks to all my customers, fans, and friends for all the support and love over the years!  Painting custom diecast has made it possible for me to meet a LOT of GREAT people and share momentous experiences with friends from all over the world.  Those friends and memories are something I will never forget and will forever be honored to be a part of.

I am announcing this change now, but in reality, this has been coming for quite a long time.  Ive not done any new paint work of my own since sometime early in November of 2015.  I have since worked on some in process work, but thats all as far as my own paint productions.  I have worked on occasion, in a designer capacity, with my good friend Dino from LB Customz (and plan on doing more designs for Dino in the future) but several things have gotten in my way and caused a block in my own productivity.

My wifes health, since her cancer diagnosis in 2013, has been my primary focus during her battle with the disease and its treatment.  That has been perhaps the biggest factor and left very little time, also made it difficult to have inspiration to perform the paint work at the level I want and am known for.  My own health has also been a major factor in this.  I suffered my forth heart attack in April of 2016, and really, most of the time, its all I can to to focus on my wife’s and my own disabilities from our respective health problems.  We havent given up by a long shot and do not intend to do so by any means…however…the stark reality is that normal tasks are now more difficult, take more effort, and sometimes are not possible as they were just a short time ago.
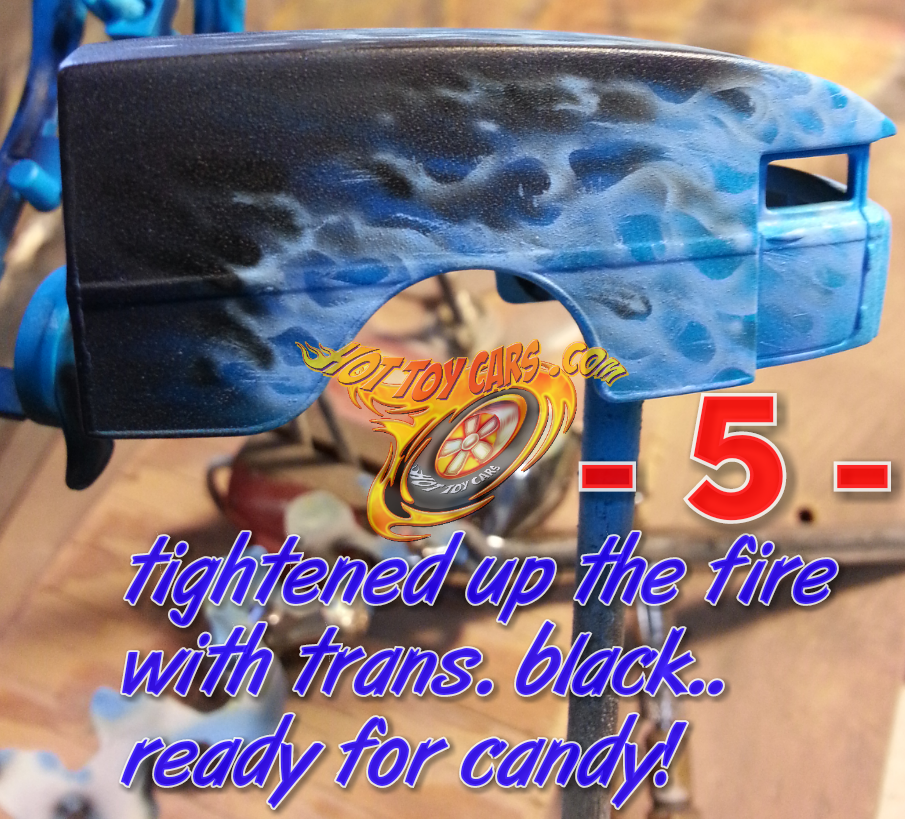
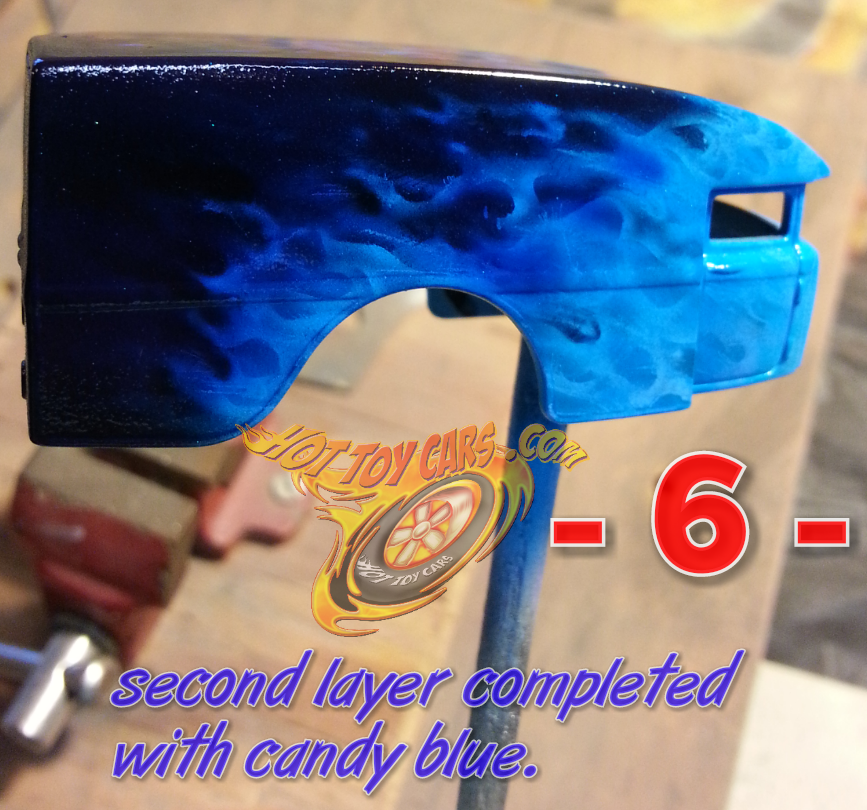
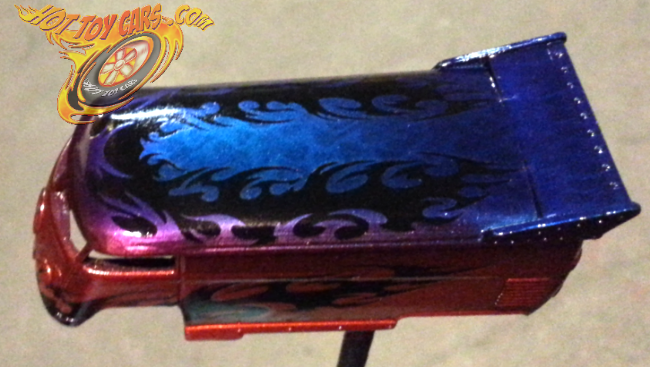
Unfortunately, I didnt realize just how much physical and mental effort it took to perform the paint work on such a small surface area.  I have always just did whatever it took and most of the time it just sort of “flowed” when doing these tiny works of art.  But over the last few years, it has become increasingly more laborious and taxing to complete diecast paint art works.  In addition, the overall custom diecast market has been waning for a couple years now..and after 17 years of painting diecast, so is my passion.  I just do not enjoy doing it as I once did and the monetary compensation is simply not enough anymore.  As such, I believe it is time to pull the plug so to speak and move on to something that will better fit my situation and its restrictions.

I am truly sorry for the delays in a few very delinquent special orders that unfortunately have fallen into this trap of health and drive issues.  Ive been trying as best I as can but, its just had to take a second spot to my wifes needs, not to mention my own at times.  I have been working on and do fully intend on completing the orders that are overdue.  As well as a couple commitments for charity auctions at upcoming conventions and hopefully, a small lot of “Final Run” KB Kustoms.  Then however, I intend to indefinitely discontinue my own paint work on diecast pieces.  As time allows, I do plan to continue working with Dino, doing designs in a collaborative position.

Thanks you so much!!  Ive had a great time doing these Hot Toy Cars!  But, its time I move on to something else and continue caring for my wife and self.  I very much appreciate your consideration and patience in the transitional period.  Watch for the final run cars and my future design works with Dino, which will be posted and sold here on Hot Toy Cars.

Kevan
KB Kustoms / Hot Toy Cars
7/4/2016

KB Kustoms Farewell Final Run.  Thank You Fans and Customers!!

Stretched Merc..in process..post clear stage!

Here’s a peek at the stretched merc coming up.  This is post clear stage as all moving panels had to be removed or risk bridging gaps…which is not a good thing!  So now…the task of sanding/polishing begins.  Followed by assembly.  Im looking at several days before its done…but…with any luck and no sand thru incidents…she will be ready sometime, late, this coming weekend.  Stay tuned!!

image

Process Shots : Blue Blazes FIRE!!

How about a rare peek at my Blue Blazes FIRE technique??

Ok…you got it! lol
STEP 1 ~ loose fire added and coated with candy blue.
wpid-2015-02-21-17.43.47.png.png
This layer is the first one and is eventually going to be more of a glow or background when subsequent layers are applied. So it is done loosely, mostly freehand with the nozzle of the airbrush tilted at a 45 degree angle, blowing towards the rear of the casting.

STEP 2 ~ Starting to add tighter, more defined fire licks.
Blue Blazess fire STEP 2
Now I begin adding tighter defined licks with a mixture of AutoAir Wicked detail White, Transparent Base and High Performance reducer.  Its almost a milky looking liquid.  2 drops of Detail Blue wicked is added to the mix when in airbrush.  I am using a Badger Sotar for this step and HotDawg stencil from FlameMasks.com to create the fire licks.

STEP 3 ~ More licks added.
Blue Blazes Fire process for 1/64th scale.  Step 3
Adding more fire licks.  Notice these licks generally are inside the confines of the first layer but do not follow it completely.  The first layer also acts as a “road map” of where the fire will go on in subsequent layers..

STEP 4 ~ Fire licks of layer 2 are completed.
Blue Blazes Fire 1/64th scale technique in process - step 4
And the last of this layers fire licks are done.  Notice these licks while more defined than the previous layer, are still a bit wide and loose.  This is how each layer should progress.  Each layer becoming tighter and more defined than the last while still not following the same paths exactly.

STEP 5 ~ Erasing and defining the licks.
Blue Blazes FIRE 1/64th scale technique ~ Stewp 5
I used a trans parent black to define and “erase” unwanted licks or areas of the 2nd layer fire licks.  This should be done with care.

STEP 6 ~ 2nd Layer completed with a few coats of candy blue.
Blue Blazes FIRE 1/64th scale technique - step 6
This is the final step for the second layer of fire. Candy blue is applied in several light layers fading from dark to very light towards the front. More layers of candy are applied at the rear than the front, creating a fade in the color.
More layers will be added (usually about 5 to 6 total} after this. Each getting more and more defined than the previous layers. The final two layers should be adding a lot less new licks, but rather add to existing licks. Thise should be small areas where the fire would be the most “hot” if it were really burning. In the last couple layers, remember the old saying “Less..is MORE.”

Tribal flamed 1 of 1 Drag Bus..in process peek!!

wpid-2015-01-31-19.04.48.png.pngFresh Tribal Flame designs tested out on this one.  Has multiple colors of candy and pearls, and some multilayer flames nestled in the middle of roof tribal licks.
Fades from Tangelo Pearl to Tangerine Candy over pearl silver on sides.  Top goes from light purple to medium blue candy, to Cobalt Blue candy.
I may be adding some more flames …still mulling it over..we will see. 😉


wpid-2015-01-31-19.03.51.png.png wpid-2015-01-31-19.05.51.png.png

What in the BLUE BLAZES? In Process

These are not ready to fly yet but thought I’d give you a peek at the EARLY stages of my “blue blazes” realistic fire technique on 1/64th scale.  Custome mixed pale blue for the base color flames followed with candy blue and red for a slightly darker fade.  All airbrushed with combinations of my Hot Dawg..Kb Fire 2…and tradition flame stencils.
The willys is getting its SECOND layer of fire licks while all others are shown in the first application layer.
More to come soon.

image

image

image

image

image

image